• Free shipping over €150
  • Fast delivery
  • Personal service
Cart

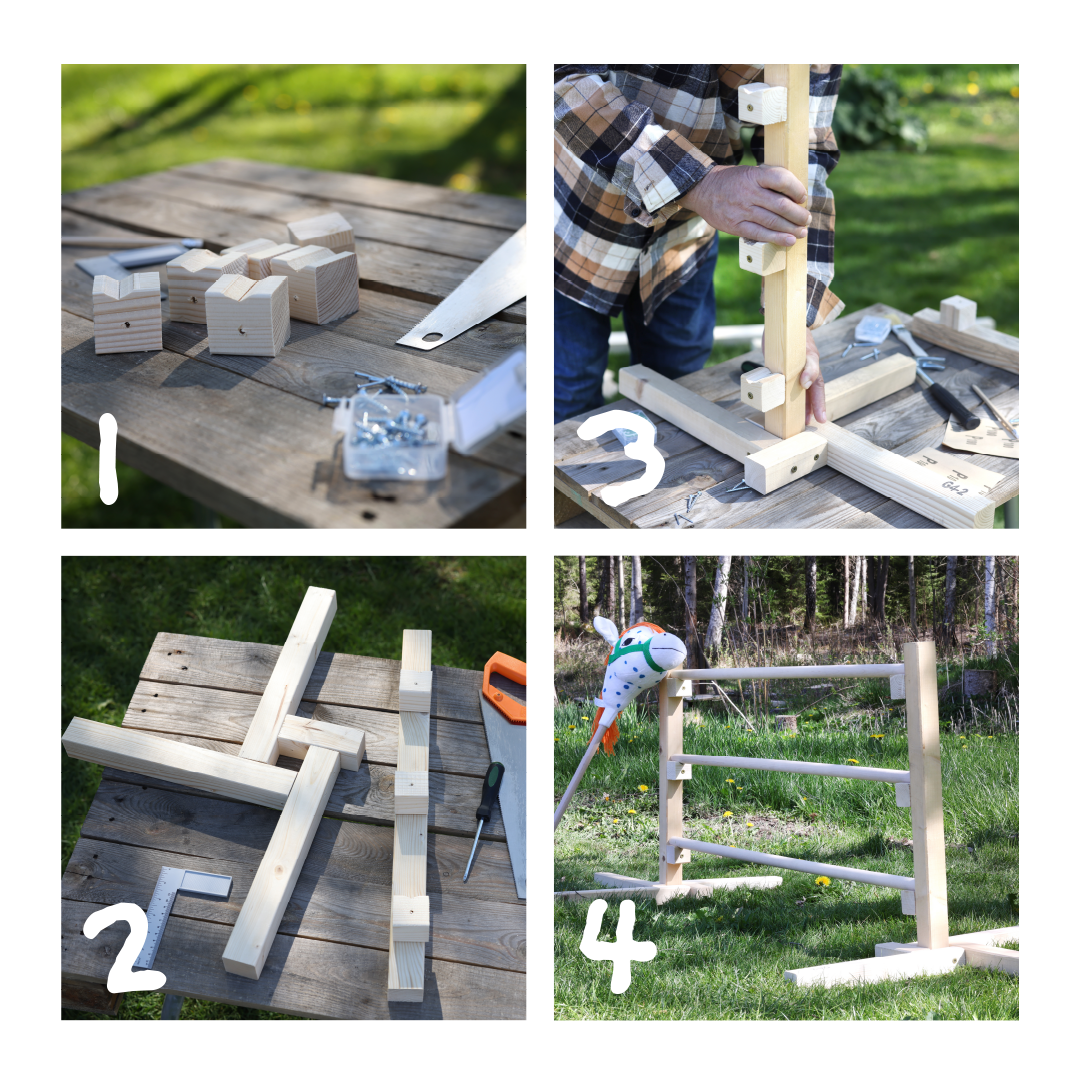
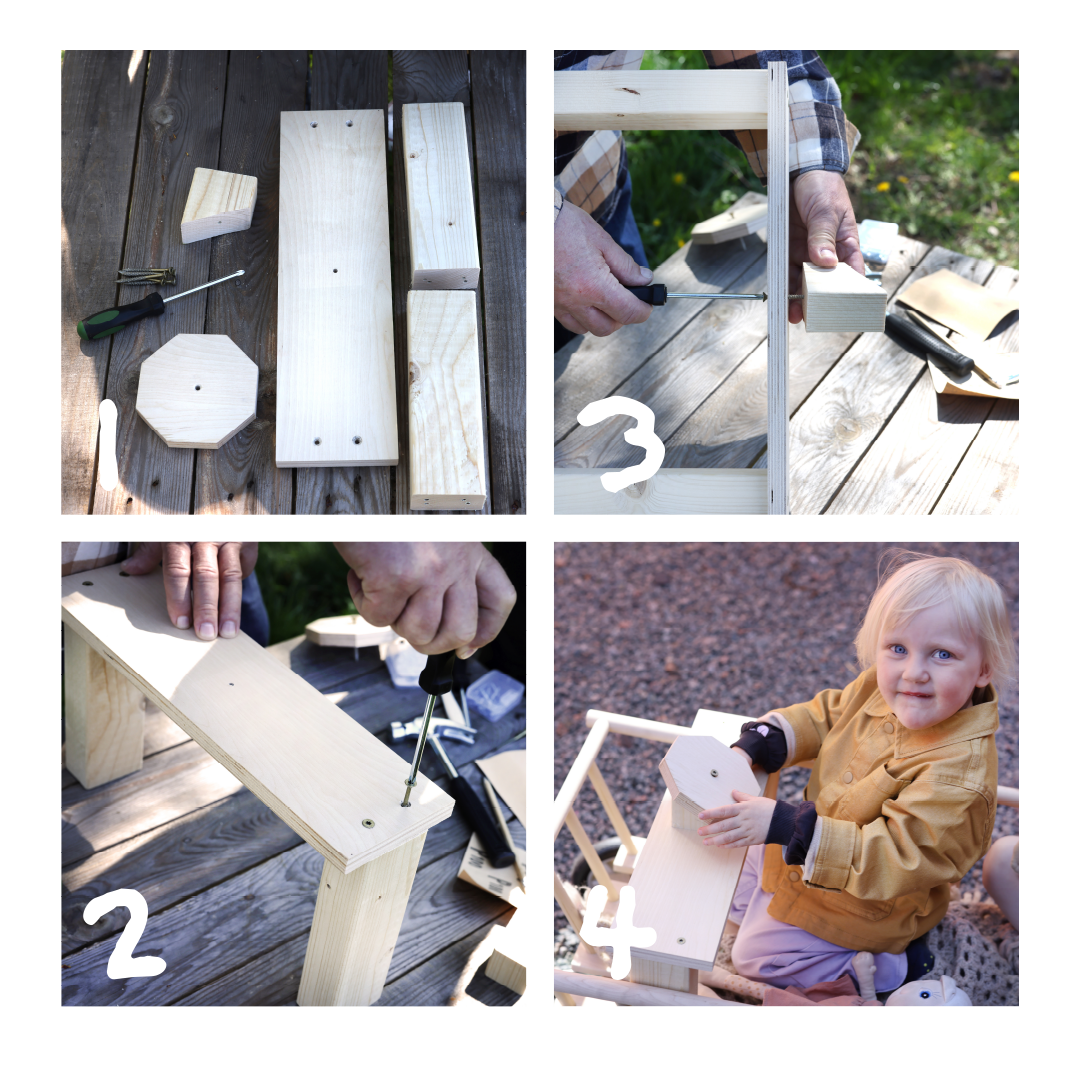
Carpentry with children

2 fun and easy things to build together

Do you want to do some carpentry with your kids? It's no secret that good weather opens up new possibilities for play. Your kids get restless and their creative side goes into overdrive. So what could be better than spending a day outside building and playing together?

2 fun carpentry projects for the summer!

We've put our most creative heads together to come up with two really playful ideas for carpentry with children. It will be a crafty woodworking day that you won't forget any time soon!

Build an obstacle for your hobby horse course:

Here's what you need:

-          Wooden beam 4.5x4.5x400 cm
-          Round rod 25 mm X 1 meter, 3 pcs.
-          Deck screws 60 mm long, 18 pcs.

Follow these steps:

Step 1: Measure 45 mm on a plank and then make a small notch in the middle of the plank where the round rod can rest. Then saw off the plank so that it becomes 45 mm long. Make six more of the same size that will serve as holders for the obstacle.

Then cut two pieces that are 60 cm long, six pieces that are 35 cm long, and two pieces that are 12 cm long.

A small tip: Pre-drill all through-holes in advance and make sure the holes are the same thickness as the screws. This applies to all through-holes!

Step 2: Take the pieces that are 60 cm long and mount 3 of the obstacle holders. You can freely choose the distance of the obstacle, but make sure the distance is the same on both pieces. The groove on the obstacle holders should be upward.

Step 3: Mount two 35 cm pieces, where one protrudes 45 mm. Then mount a 35 cm piece with a 12 cm piece. Here too, the 12 cm piece should protrude 45 mm.

You can follow the image instructions below:

Build fun accessories for Micki's wooden pull along wagon:

Here's what you need:

-          Planed spruce 21x120 mm 70 cm
-          Wooden beam 45x70 mm 50 cm
-          Deck screws 60 mm long, 6 pcs.

Follow these steps:
Step 1: Cut your planed spruce so that you have a piece that is 43 cm long and one that is 12 cm long. Then cut off the four corners of the piece that is now 12x12 cm. This will give you an octagonal steering wheel for the cart. Cut a beveled piece of the wooden beam, 8 cm at the high end and 4 cm at the low end.

Step 2: Now cut the wooden beam so that you have two 22 cm long pieces. Make sure to drill all through holes the same thickness as the screws. Then attach the 43 cm piece with a piece from the wooden beam at each end.

Step 3: Attach the beveled piece to the 43 cm piece. Take the steering wheel and attach it to the beveled piece, but be careful not to screw it on too tightly so that the wheel can spin when the child is pushing the cart.

If you want, you can skip the steering wheel altogether and voila, you have a table for the cart!

You can follow the image instructions below:

Good luck and have fun!